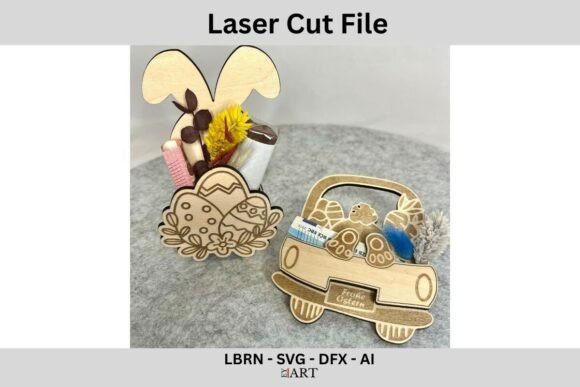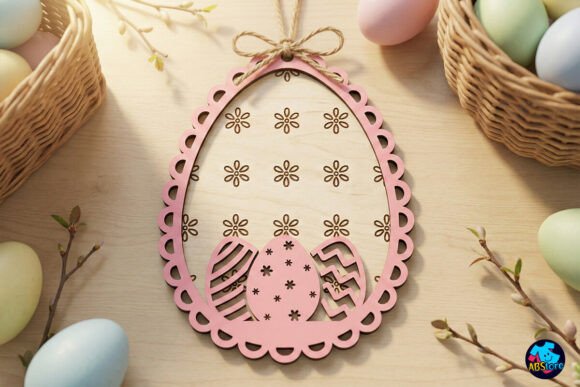
3D Layered Laser Cut Easter Egg Ornament
Creating a stunning centerpiece for your holiday decor doesn’t always require expensive materials or years of crafting experience. The 3D Layered Laser Cut Easter Egg Ornament offers a sophisticated way to add depth and elegance to your spring celebrations. By combining multiple layers of material, typically cardstock or thin wood, this design creates an illusion of volume that flat decorations simply cannot match. It is a perfect project for hobbyists looking to elevate their DIY skills and for small business owners aiming to produce high-quality, handmade goods for the seasonal market.
However, purchasing digital cut files requires a different mindset than buying a physical craft kit. There are several common pitfalls that can lead to frustration, wasted time, and disappointing results. Understanding these nuances before you download will ensure you get the most out of your purchase and achieve professional-grade finishes every time.
Understanding the Digital Format
When you acquire the 3D Layered Laser Cut Easter Egg Ornament, you are not receiving a tangible object. This is strictly a digital product. The package includes three essential file formats: SVG File, EPS File, and DFX File. These formats serve different purposes depending on your equipment and software proficiency.
- SVG (Scalable Vector Graphics): Ideal for cutting machines like Cricut or Silhouette. This format allows you to resize the design without losing quality, which is crucial when scaling the egg ornament up for large displays or down for delicate jewelry.
- EPS (Encapsulated PostScript): Preferred by graphic designers using Adobe Illustrator or CorelDRAW. This vector format ensures precise editing capabilities if you wish to modify the intricate patterns within the egg layers.
- DFX (Drawing Exchange Format): Specifically designed for CNC routers and laser cutters that operate with CAD software. If you plan to use industrial-grade machinery, this file type provides the necessary coordinate data for accurate cutting.
These files are compressed into a single ZIP File. You must extract them using software such as WinZIP, WinRAR, or similar tools. Failing to unzip the folder correctly may result in corrupted files that your cutting machine cannot read. Always verify that all three file types are present and accessible before attempting to load them into your software.
Common Mistakes in Material Selection
One of the most frequent errors creators make is choosing the wrong material thickness. The 3D Layered Laser Cut Easter Egg Ornament relies on the friction fit between layers to maintain its structure. If the material is too thick, the layers will not slide together smoothly, potentially causing the egg to bulge or break apart. Conversely, if the material is too thin, the structural integrity may be compromised, leading to a fragile final product.
Cardstock is often the go-to choice for beginners because it is affordable and easy to work with. However, not all cardstocks are created equal. A heavy-weight cardstock (around 110lb to 130lb) usually provides the best balance of stiffness and flexibility. For a more premium look, consider using birch plywood for a rustic aesthetic or acrylic sheets for a modern, translucent glow. Regardless of the material, ensure it is clean and free of dust before loading it into your cutter, as debris can interfere with the suction feet of your machine and cause misalignment.
Ignoring Software Settings
Even with perfect files and materials, poor software settings can ruin your project. Many users overlook the importance of setting the correct line weight and color coding in their design software. Most cutting machines interpret specific colors as instructions—for example, red lines might mean "cut" while blue lines mean "score."
If you do not configure these settings according to the manufacturer’s guidelines, your machine might attempt to score where it should cut, or vice versa. This can result in partial cuts that leave the layers attached, requiring tedious manual trimming. To avoid this, consult the documentation provided with your cutting machine. Create a test run using scrap material from the same batch before committing to your final decorative pieces. This small investment of time can save hours of frustration and prevent waste.
Neglecting Assembly Techniques
The beauty of a layered ornament lies in its assembly. Rushing this step is a common mistake that leads to uneven spacing and visible gaps. When assembling the 3D Layered Laser Cut Easter Egg Ornament, start from the center layer and work outward. Use a sharp tool, such as an exacto knife or a pin, to gently push the tabs into place. Do not force the layers; if they resist, check for burrs or rough edges left by the laser cutter, which can be smoothed with sandpaper or a nail file.
Another overlooked detail is the orientation of the grain. If you are using paper-based materials, be mindful of how the fibers align. Cutting against the grain can sometimes cause the material to tear or curl unexpectedly. Aligning the layers so that the grain runs consistently across all pieces helps maintain a uniform shape and prevents warping over time.
Legal and Usage Considerations
It is vital to respect the intellectual property rights associated with digital designs. Note that the actual files may not be shared or resold in any form. This restriction protects the creator’s livelihood and ensures the sustainability of the design community. While you can sell physical items made from the 3D Layered Laser Cut Easter Egg Ornament files, you cannot distribute the digital files themselves, whether for free or for profit.
For entrepreneurs, this means focusing on value-added services. Instead of just selling the ornament, consider offering customization options, such as personalization with names or dates, or bundling it with complementary decorations. This approach not only complies with usage terms but also enhances customer satisfaction and brand loyalty.
Final Tips for Success
To ensure a smooth experience, keep a few practical tips in mind. First, always back up your downloaded files to a cloud service or external drive. Digital purchases can sometimes be difficult to retrieve later if your account access changes. Second, invest in a good quality adhesive if you plan to reinforce the layers. While the friction fit is strong, a dab of clear-drying glue can provide extra security for ornaments that will be handled frequently or hung in high-traffic areas.
Finally, embrace the learning process. Crafting with layered designs requires patience and precision. Each project teaches you more about your machine’s capabilities and the behavior of different materials. By avoiding common mistakes and following best practices, you can create beautiful, durable, and impressive 3D Layered Laser Cut Easter Egg Ornament pieces that stand out during the Easter season. Whether you are decorating your own home or creating gifts for loved ones, the result will be a testament to your skill and attention to detail.