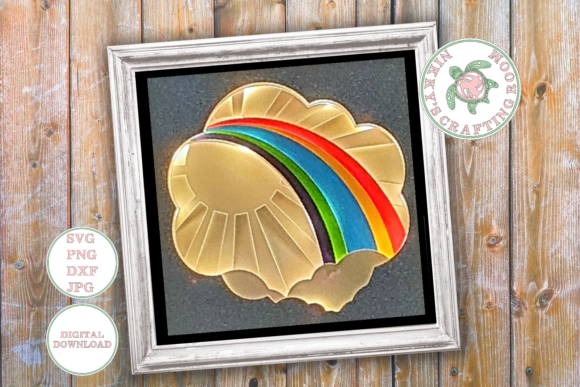
Rainbow 3d Shadow Box Template
Crafting a visually striking three-dimensional display requires more than just artistic vision; it demands precise planning, efficient execution, and the right digital assets. The Rainbow 3d Shadow Box Template addresses these needs by providing a structured, layer-based design that simplifies the transition from concept to physical object. This template is not merely a static image but a functional workflow tool designed for creators who value precision and time efficiency. Whether you are a hobbyist looking to create a unique gift or a small business owner producing custom decor for retail, understanding how to integrate this digital file into your production process is essential for consistent, high-quality results.
Understanding the Digital Asset Structure
The core value of the Rainbow 3d Shadow Box Template lies in its organizational structure. When you download the zipped file, you are receiving a comprehensive package containing SVG, PNG, DXF, and JPG formats. However, the true utility comes from how these files are prepared for cutting machines like Cricut or Silhouette. The SVGs are engineered with all layers grouped together, a feature specifically intended to streamline your workflow. This grouping ensures that when you import the design into your cutting software, every element remains aligned relative to one another, eliminating the need for manual repositioning.
This pre-grouped architecture is critical for maintaining the integrity of the 3D effect. Each layer represents a specific depth plane in the final shadow box. By keeping these layers intact during the initial upload, you preserve the spatial relationship between the rainbow arcs and supporting structures. This reduces cognitive load during the setup phase, allowing you to focus on material selection and machine calibration rather than troubleshooting misaligned cut lines. The inclusion of multiple file formats also ensures compatibility across different platforms, whether you are using proprietary software or open-source vector editors.
Optimizing Workflow for Resizing
One of the most common pitfalls in digital crafting projects is improper resizing, which can distort proportions and ruin the aesthetic balance of a design. To maintain the quality of the Rainbow 3d Shadow Box Template, it is imperative to follow a strict resizing protocol. When you open the SVG in your design software, ensure that the padlock icon—representing aspect ratio locking—is engaged. You must resize the width only, allowing the height to adjust proportionally automatically.
This method prevents skewing, which can occur if width and height are adjusted independently. For a shadow box project, uniform scaling is non-negotiable because the alignment of layers depends on precise geometric ratios. If one layer scales differently than another, the 3D illusion collapses, resulting in a flat or disjointed appearance. By adhering to the "width-only" rule while keeping layers grouped, you ensure that every component of the rainbow design maintains its intended visual weight and position. This attention to detail at the digital stage saves significant time during assembly, as there is no need to correct errors later.
Material Selection and Preparation
Once the digital file is prepared, the next phase involves sourcing appropriate materials. The success of a 3D shadow box relies heavily on the rigidity and finish of the cardstock used. For this project, we recommend using quality cardstock ranging from 180 to 300gsm. Lighter papers may lack the structural integrity needed to hold their shape within the frame, while excessively thick paper might strain the cutting blade or make stacking layers difficult due to bulk.
The choice of color plays a pivotal role in the final outcome. Since the template features a rainbow motif, selecting cardstocks with vibrant, saturated hues will enhance the visual impact. Additionally, consider the texture of the paper; smooth finishes reflect light more evenly, which is beneficial if you plan to incorporate lighting elements. Before cutting, organize your workspace by sorting cardstock sheets by color and thickness. This preparation step minimizes downtime during the cutting process, allowing for a smoother, more efficient production run. Consistency in material choice across all layers ensures that the shadow box feels cohesive and professional.
Assembly Strategies: Lit vs. Unlit Configurations
The Rainbow 3d Shadow Box Template offers versatility in its final presentation. It can be assembled as a traditional shadow box without lights or enhanced with LED fairy lights for a glowing effect. The decision between these two configurations should be made early in the planning phase, as it influences the required components and assembly sequence.
Standard Assembly
For a standard assembly, the primary tools required are a glue gun and glue sticks. The process involves stacking the cut layers in a specific order, typically starting from the background and moving forward. Use spacers between each layer to create depth. These spacers can be strips of cardstock or specialized foam tape, depending on the desired thickness. Precision in spacing is crucial; uneven gaps can cause the layers to tilt or look misaligned. Once spaced, apply adhesive carefully to the edges of each layer, ensuring that the glue does not seep through and mar the visible surfaces.
Integrated Lighting Setup
Incorporating lights adds a dynamic element but introduces additional complexity. You will need LED fairy lights, which should be tucked behind the rearmost layer before assembly begins. Ensure that the battery pack is accessible, either by leaving a small gap in the backing or by attaching the pack to the exterior of the frame. The lights should be positioned to illuminate the entire rainbow spectrum evenly. This configuration requires careful management of wire placement to avoid visible clutter. The glow from the LEDs can also soften shadows, creating a dreamy atmosphere that contrasts with the crisp lines of the cut paper.
Hardware Considerations for Depth and Display
The physical container for your creation is just as important as the content inside. A deep shadow box frame is recommended, with a minimum depth of 8x8 inches being ideal for this scale. Shallower frames may not provide enough room for the layered structure, causing the top layers to press against the glass and flatten the 3D effect. A deeper frame allows air circulation and provides ample space for the spacers, ensuring that each layer stands out distinctly.
When selecting a frame, consider the mounting mechanism. Some frames use clips, while others rely on pressure from the backboard. Ensure that the chosen frame can accommodate the total thickness of your layered stack plus any lighting components. Testing the fit with a mock-up using scrap paper before committing to your final materials is a prudent step. This trial run helps identify potential issues with clearance or stability, allowing you to adjust spacer heights or layer counts before gluing everything permanently.
Long-Term Maintenance and Quality Control
A well-executed 3D shadow box is a durable piece of decor, but it requires proper handling to maintain its integrity over time. Dust accumulation between layers can dull the vibrancy of the colors, so sealing the frame tightly is essential. If using lights, regularly check the connections and battery life to prevent leakage or failure. For frames without lights, periodic dusting with a soft brush or compressed air can keep the interior clean without disturbing the delicate layers.
From a workflow perspective, documenting your assembly process for future reference can be valuable. Note down the specific spacer heights used, the type of adhesive applied, and any adjustments made during fitting. This documentation becomes part of your personal knowledge base, making subsequent projects faster and more reliable. By treating each craft project with the same rigor as a business task—planning, executing, and reviewing—you elevate the quality of your output and reduce frustration.
Integrating the Template into Creative Projects
The Rainbow 3d Shadow Box Template fits seamlessly into broader creative workflows. For educators, it serves as an engaging STEM activity combining geometry, art, and engineering. For marketers, it can be a unique branded giveaway item that demonstrates attention to detail. Entrepreneurs might use similar techniques to create custom packaging inserts or display pieces for trade shows. The modular nature of the SVG file allows for customization; you can modify colors, swap out shapes, or add text to align with specific branding guidelines or thematic requirements.
Ultimately, the efficiency of the template lies in its ability to remove technical barriers. By providing pre-grouped, correctly formatted layers, it allows you to bypass the tedious work of vector tracing and layer organization. This frees up mental energy for higher-level decisions about design aesthetics and user experience. Whether you are producing one-off pieces for personal enjoyment or scaling up production for a boutique shop, mastering the integration of this template into your routine ensures consistent, professional results every time.