3D Decorative Lantern Laser Cut
Transforming a flat digital file into a tangible, glowing centerpiece is one of the most satisfying experiences in modern crafting. The 3D Decorative Lantern Laser Cut design offers a unique opportunity to blend architectural precision with artistic expression. Unlike standard 2D decals or simple cutouts, this project requires you to think in three dimensions, assembling layers to create depth, shadow, and light play. It is not just about cutting shapes; it is about engineering a structure that interacts with its environment.
This digital product is designed for those who appreciate the intersection of technology and traditional craft. Whether you are a seasoned woodworker with a CNC machine or a hobbyist using a desktop laser cutter, this file provides a robust foundation for creativity. The result is an original design that serves as a striking focal point for any home office, living room, or commercial space. By understanding the mechanics of layering and light diffusion, you can create pieces that feel both modern and timeless.
Understanding the Digital Asset
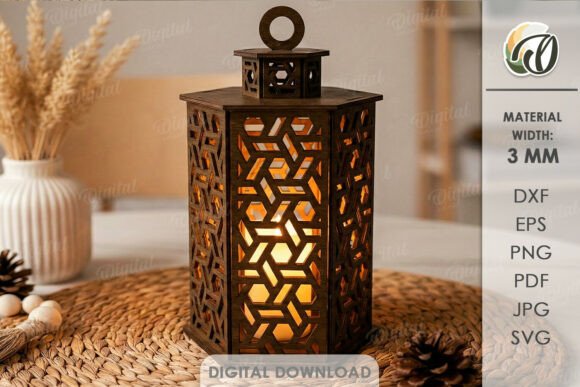
Before diving into the creative process, it is essential to understand what you are purchasing. This is a digital download, meaning no physical goods will be shipped to your address. Upon purchase, you receive a zip folder containing a single, meticulously crafted design available in multiple industry-standard formats: SVG, DXF, EPS, PDF, JPEG, and PNG. This versatility ensures compatibility with a wide range of software and hardware, from CorelDRAW and Adobe Illustrator to LightBurn and various CAM programs.
The inclusion of vector files (SVG, DXF, EPS) allows for infinite scalability without loss of quality, which is crucial when adjusting the size of your lantern to fit specific spaces. Meanwhile, the raster files (JPEG, PNG) serve as excellent visual references during the assembly phase. The design is optimized for a material width of 3mm. This specification is critical; using materials that are too thin may compromise structural integrity, while materials that are too thick might prevent precise fitting or require adjustments to the laser’s power settings. Adhering to this thickness ensures the interlocking tabs and slots function as intended, creating a sturdy frame without the need for excessive adhesives.
Creative Possibilities and Material Choices
The beauty of the 3D Decorative Lantern Laser Cut lies in its adaptability. While the geometry remains constant, the aesthetic outcome changes dramatically based on your material selection. Here are several approaches to interpreting this design:
- Natural Wood Accents: Using birch plywood or basswood brings warmth and organic texture to the piece. The natural grain adds a layer of complexity that contrasts beautifully with the sharp, geometric lines of the laser cuts. This approach works exceptionally well for rustic, Scandinavian, or mid-century modern interiors.
- Ambient Acrylic Glow: For a contemporary look, consider using translucent acrylic sheets. When backlit, the lantern becomes a source of ambient lighting rather than just a decorative object. Clear or frosted acrylics allow light to diffuse softly through the intricate cutouts, casting mesmerizing shadows on surrounding walls.
- Eco-Friendly Cardstock: If you are looking for a lighter, more temporary installation, heavy-weight cardstock or kraft paper can yield stunning results. This is particularly effective for event decor, wedding centerpieces, or seasonal holiday displays where portability and cost-efficiency are priorities.
- Metallic Finishes: Thin brass or copper sheets can elevate the lantern to a luxury status. The metallic sheen reflects light dynamically, creating a shimmering effect that changes throughout the day. However, cutting metal requires specialized laser equipment and safety precautions.
Experimentation is encouraged. Do not limit yourself to a single material type. You might even combine two different woods or pair wood with acrylic to create hybrid textures. The key is to maintain consistency in the 3mm thickness across all layers to ensure proper alignment.
Assembly and Technical Considerations
Creating a successful 3D lantern requires patience and attention to detail. The assembly process typically involves stacking layers and securing them together. While some designs use friction-fit joints, others may benefit from minimal adhesive application at key stress points. Use a high-quality wood glue or acrylic cement sparingly to avoid seepage that could cloud transparent materials or stain porous ones.
When preparing your file for cutting, always perform a test run on scrap material. This step helps you verify the scale and check for any potential issues with the laser’s focus or power settings. Pay close attention to the orientation of the grain if using wood, as cutting against the grain can sometimes lead to charring or uneven edges. Additionally, ensure that your ventilation system is active, especially when working with plastics or treated woods, to maintain a safe working environment.
Once the pieces are cut, organize them by layer number before beginning assembly. Labeling each piece with a pencil on the non-visible side can save significant time during the construction phase. Start from the base and work your way up, ensuring each layer is perfectly aligned before securing it. A small amount of precision here pays off in the final stability and appearance of the lantern.
Applications and Audience Adaptation
This design appeals to a diverse audience, each with unique goals. For interior designers, this lantern offers a customizable element that can be tailored to match specific color palettes and themes. They can adjust the opacity of materials or choose specific wood stains to complement existing furniture. For educators and makerspaces, this project serves as an excellent introduction to 3D modeling concepts and laser cutting technology. It teaches students about spatial reasoning, material properties, and precision manufacturing.
Entrepreneurs and small business owners can utilize this design for branding purposes. Imagine a custom-branded lantern used as a giveaway item or a display piece in a retail store. The digital nature of the product allows for easy modification of logos or text within the design file, making it a versatile marketing tool. Similarly, blogger and content creators can use these lanterns as props for photography, video backgrounds, or DIY tutorial content, adding a professional touch to their visual storytelling.
For hobbyists and freelancers, this project represents a balance of challenge and reward. It is complex enough to be engaging but straightforward enough to complete in a weekend. The satisfaction of holding a self-assembled, functional art piece is unmatched. Furthermore, the endless possibilities mean you never have to make the same lantern twice. You can rotate colors, change materials, or alter the lighting setup to keep your decor fresh and dynamic.
Final Thoughts on Creative Execution
The success of your 3D Decorative Lantern Laser Cut project depends on a blend of technical accuracy and creative vision. Keep your workspace organized, follow the recommended material specifications, and don’t be afraid to experiment with lighting angles. The interplay of light and shadow is what truly brings the design to life. Whether you are creating a solitary statement piece or a series of matching decorations, the process itself is a valuable exercise in digital fabrication.
We hope this guide inspires you to explore the full potential of this design. Thank you for visiting our store. If you have any questions regarding file usage, material choices, or assembly techniques, please do not hesitate to reach out. We are here to support your creative journey. Happy shopping, and enjoy the process of bringing your ideas to life.